|
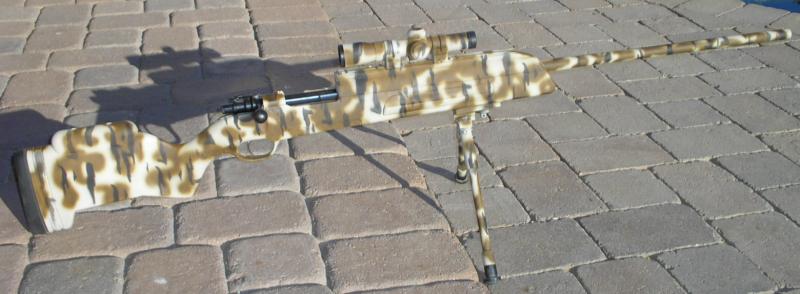
Gunversation Project: Come build a super scout rifle using a straight-bolt Turkish Mauser and an Advanced Technology® stock.
|
||
| Today's project is to build a poor-man's
scout rifle using a $50 surplus Turkish Mauser straight bolt action
mounted in an Advanced Technology® stock.
The weapon should be be camoflauged, accept stripper clips, use a long
eye relief scope, and sport a bipod. The philosophy of this gun project is to build a Mad Max sort of
weapon platform using the most inexpensive components available.
Nothing but the best for this gun!
I have always had a weakness for sporterized Mausers. There are so many inexpensive military surplus rifles on the market right now that they just beg to be modified. The Advanced technology stock had caught my eye when it first came out because it allowed you to convert to a new stock and add a scout scope at the same time. The latter would run you at least $80 through Brownell's. Here was a stock that did it for $69.
Right off, I determined that the original black finish was not going to fly. Keep in mind that when I bought this stock the Realtree Camo version was not available. Were I to buy one now, I'd go with the factory camo (see the pic at the top of the article) and get a scope with realtree, then leave the bipod and equipment black. Instead I went with a totally custom alternative.
The design for this stock was interesting. Using a solid aluminum block to mount the receiver to the upper stock held the rigid scope-rail very well. What I was not entirely happy with was the magazine follower. For some reason the makers of this well thought out stock failed to add something to hold the spring follower in place. Once I had test fired the weapon, it was time to tear down, and paint up. I always start with a good degreasing. This time out I tried a product that claimed to be specifically designed for pre-painting degreasing. I had used other Goof Off products and found them remarkable enough. Thus far, the stuff seems to have worked as advertised. Making surfe not to handle the stock with bare hands, I gave it a good primer coat, inside and out. Getting a good primer coat down is of vital importance. If you fail here, the finish will come off and look like crap. Do it right and the finish will last for years. After the primer comes the textured finishes. I masked off an area for this that was both functional as well as attractive. There are dozens of textured paints out there. Krinkle paint, stone finishes, and even trunk paint will all give various looks and functionality. For a rifle I prefer to use a finish that doesn't rise up too high from the stock. The taller finishes like krinkle paint tend to wear excessivly as the high points get rubbed off. Go with a good stone finish and be sure to dry it in the hot sun for a day or two before proceeding to the next step. Be sure to remove the masking tape at this point. I found a neat paint for the basecoat. Designed for outdoor furniture, it sported a light textured finish that gave the entire rifle a shark skin feel to it. Even wet this rifle will be slip proof. Once again, I apply two coats and let it harden for a couple of days. The camo paint is next. First I airbrush a basic green camo pattern in a shade designed to blend with the shadows seen in the underside of Arizona brush. When this weapon is deployed, it will be on a bipod underneath either cat claw, creosote, or one of those dirty gray weeds (Dammit Jim! I'm a doctor, not a bononist!) The vertical tiger stripes were designed to align with the stalks of those same bushes. Camoflauge works because the human eye wants to fit things it sees into the scenery. This pattern will either blend with the shadows or align with the trunks of the weeds. After the camo, the entire project gets two good coats of a clear, flat finish that seals everything in. Let it harden before final assembly. While I waited I took the time to blue the bolt with my all-time favorite cold blue; 44-40. I've tried the others and you can keep that Birchwood-Casey crap. I'll drive clear across town to Murphy's Guns just to get 44-40. Test firing was a delight. I was easily able to zero the beast to a hundred yards. Then again, with that 29 inch barrel the muzzle is already halfway there! Actually that long barrel is really great because even old surplus ammo shoots well since it gets the extra six inches of barrel to finish accelerating. With factory ammo I was able to reliably hit can-sized targets out to 100 yards with ease. Although the rifle is immense with this stock, I found
that the straight bolt helped when carrying the
rifle. Just lock the safety all the way to the right
and you could switch to a left handed carry.
Personally I have found the Straight bolt Mauser easier to
operate than a turned down bolt. If you don't have
Optics to worry about, then stay with the classic straight
bolt. One happy note is that Hotshot is offering decent soft point ammo for the 8x57 for about $9.99 a box of 20. Although manufactured in Bosnia, the ammo uses boxer primed reloadable cases. I found the ammo to be almost as good as the cheapest Winchester ammo in the same caliber.
|
1) ASSEMBLY
This is a good look at the reciever/toprail barrel lug that holds the scope rail securely to the barrel. Not a bad system, just a bit tricky. I didn't have any issues with wandering crosshairs or changing point of aim from slippage.
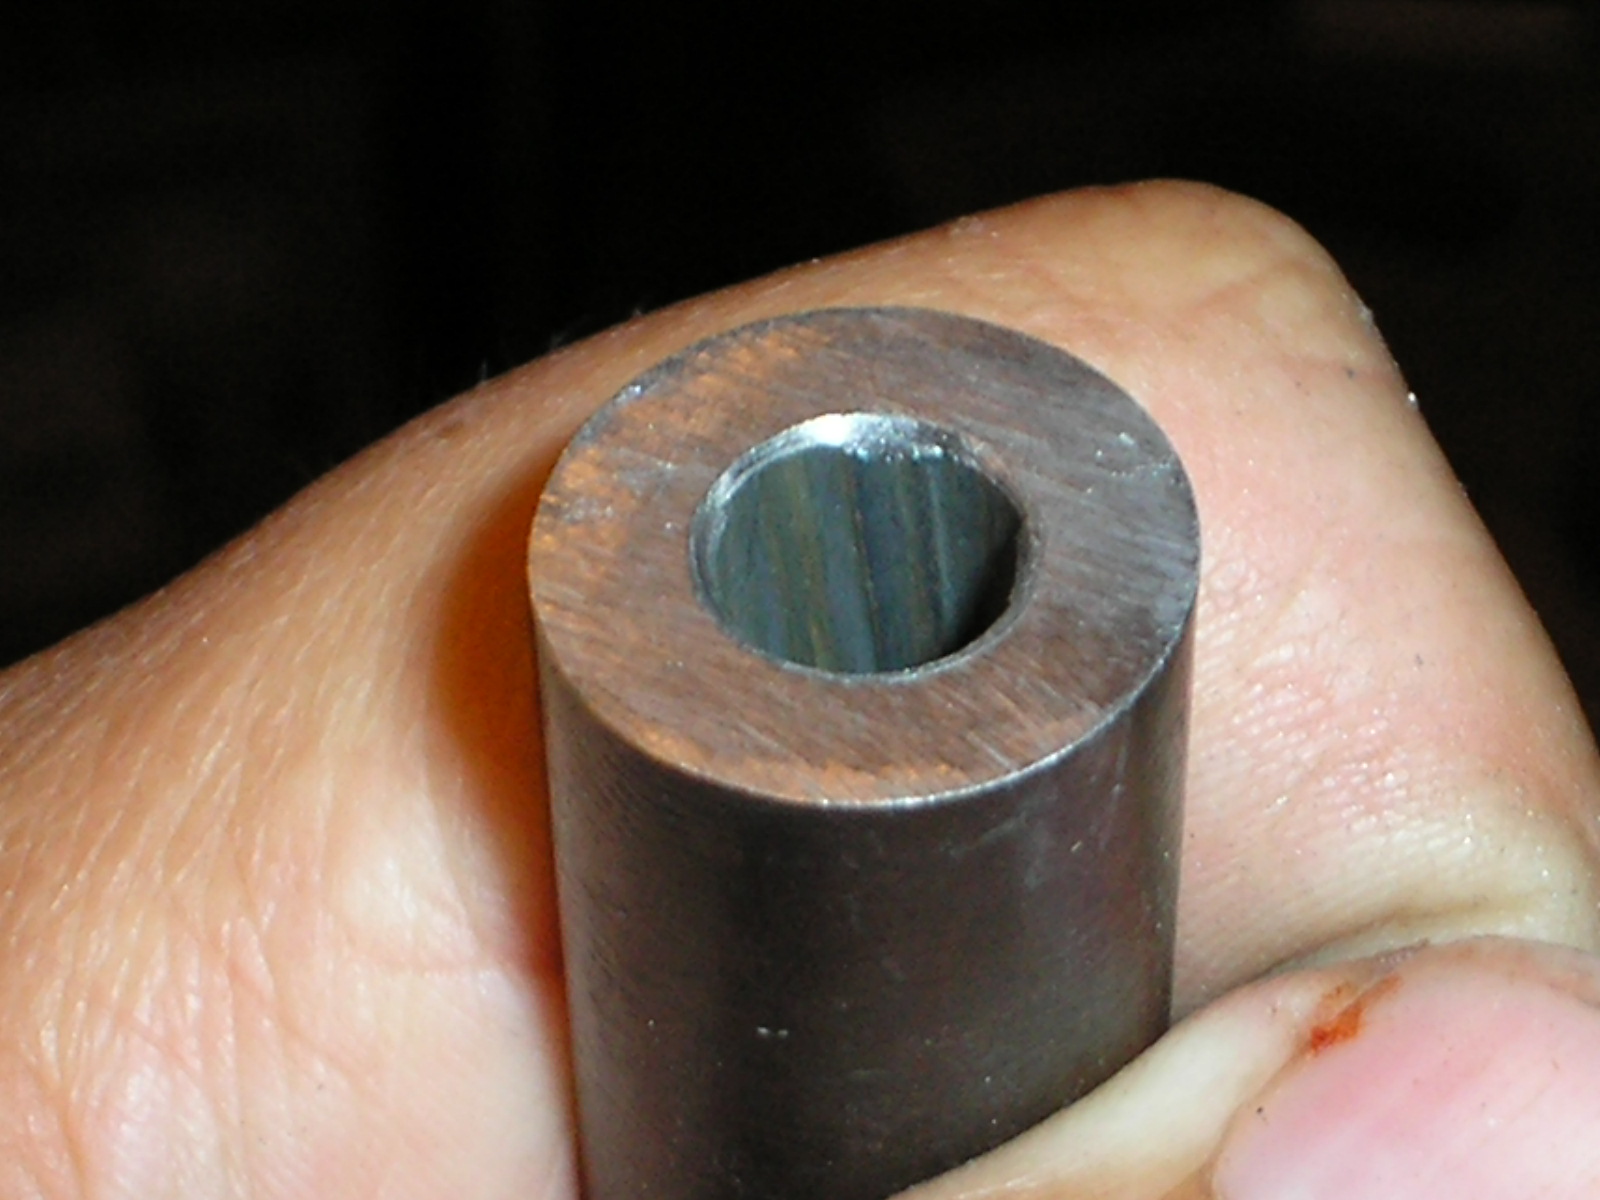
The integrated scoperail is securely mounted to the barrel by means of 4 screws that burrow directly into the barrel block. I had wanted the ability to use stripper clips so I removed several inches of rail by chopping it off at the end of the reciever. You can best see the difference by comparing the two rifles at the top of the article.
Before and after: On the right is the old crown before I cut 3/4" off the barrel. On the left is the barrel after cutting but still needing final polishing and crowning.
Here is the new muzzle and crown. The metal will be treated with Rustoleum primer and paint to seal it. Don't worry about length though, this monster still sports a 29 1/4" barrel.
Mounting the cheekpiece is simple enough. Although you may be tempted to mount it slightly forward, don't! That will make it more likely to be dinged whenever you remove the bolt. Try to center the cheekpiece.
2) PAINTING
Degreasing: After sanding is finished, clean all surfaces with a good degreaser. An oily fingerprint can ruin a good finish later. This product made by Goof Off claims to be perfect for pre-paint cleansing. It worked will enough.
Mask and prime all of the parts that are to be painted. In this rare case the author decided to paint the metal. Normally painting metal is taboo for various collectable reasons. However, here is nothing special about this fifty-dollar Turkish Mauser and the finish will actually protect the metal.
Mask the weapon for the texturing spray. The exposed areas will have a rough finish applied by use of crinkle paint from the local hardware store. Trunk paint is another option you can find at most automotive stores. Notice the round masking cover over the screwhole. This makes a a nice touch when the rifle is finished.
After giving the textured paint a few days to fully harden, remove the masking and apply the basecoat. For this project I chose an outdoor paint that included a lightly textured finish-giving the entire rifle a shark-skin feel to it. When painting a camo finish, your basecoat should be the lightest color of the scheme. It's easier to paint dark colors over lighter ones.
Here we see the first layer of camo. I always like to practice on a piece of cardboard before I work on the gun. Every camo pattern is different and you should be sure to master the nuances before trying on the gun. However, if you do screw up the camo at this point, the airbrush puts down such a fine layer of paint that you could just reapply another layer of basecoat and try again.
The final product. After finishing the paint & finish, the bolt has been blued, magazine spring installed, and final assembly. With decent ammo, the rifle should be accurate out to 500 yards or better. Total project cost: $250 (includes the rifle.) |
|


 Preparing
the surface. An often overlooked step that has
catastrophic results later. This stock is the victim of a poor
primer job resulting in loss of the textured paint used to cover the
stock. In this case, either the old finish was not properly
removed, or the stock was not properly degreased.
Preparing
the surface. An often overlooked step that has
catastrophic results later. This stock is the victim of a poor
primer job resulting in loss of the textured paint used to cover the
stock. In this case, either the old finish was not properly
removed, or the stock was not properly degreased.