
Fire
up PSP and open up the image you want to
turn into a mask.
When
it's opened up, you will only have a
small selection of colours available in the colour
palette - a few variations of black and white. PSP
needs to have all the colours
available before it'll let you do most
things for some bizarre reason, so we
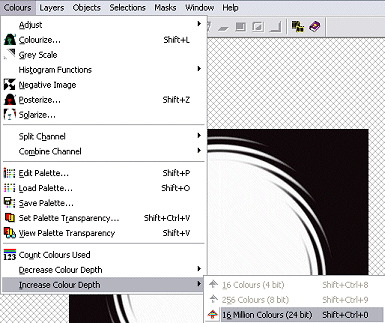
need to go to the File menu, then down to
Increase Colour Depth and across to 16
Million Colours:
Now
that we've done what PSP wants us to
do, it's time for PSP to return the
favour! :o)
We
need to let PSP know that we want to
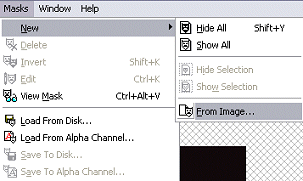
make a new mask from this picture, so
go to the "Masks" menu, down
to "New" and across to
"From Image"
A
small dialogue box will come up with a
few different options in it. Use
these settings for your mask then hit
OK
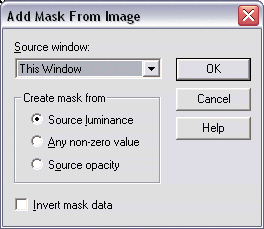
Source window: This Window
Create mask from: Source
luminance
Invert mask data: unchecked
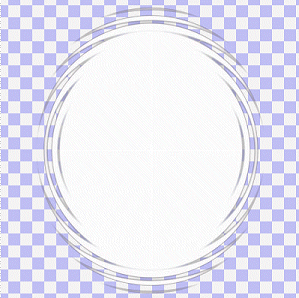
You'll
notice that all the black bits of your
image have gone now. That's
cool... this is PSP's way of showing
you what the mask will look like when
you've applied it to your picture -
the white areas are the bits of your
picture that will be left and the
black bits are the areas of your
picture that the mask will take
away.
Now
we need to let PSP know that we want
to save this mask on our computer to
use on our pictures, so go back to the
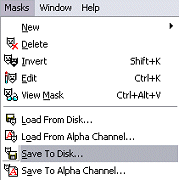
"Masks" menu, then down to
"Save To Disk"
A
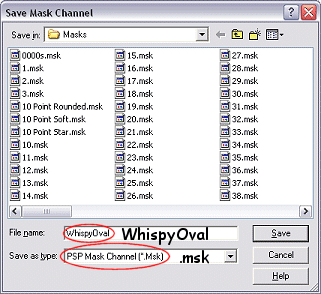
dialogue box has now popped up asking
you about where you want to save your
mask and what you want to call
it. If it's not already pointing
to it, use the drop-down box at the
top to navigate to the Masks folder
within your PSP directory - this is
usually in c:/Programme Files/Jasc
Software/PaintShop
Pro/Masks.
When
you've got it pointing to the right
directory, give your mask a name - I'm
going to call mine WhispyOval (just 'cos
I can't think of any other name for
it! lol)
In
the drop-down box underneath where you
name your mask, make sure that it's
got the extension of .msk - PSP should
have automatically put it in for you,
but it's always better to be safe than
sorry :o)
When
you've got all that sorted, hit
"Save"
Congratulations!
You've just made your first mask from
a black and white image!! You
might want to test it out to make sure
of what it looks like... if you're not
sure how to use a mask, follow this
tutorial.

