Fire
up PSP (if you already had it open
when you extracted the .zip file,
you'll need to close it down and start
it up again so that PSP can see the
new file)
When
it's chugged and whirred into action,
you need to open up the picture you
want to use the mask on (File, Open,
then navigate to where you've saved
the photo then click OK)
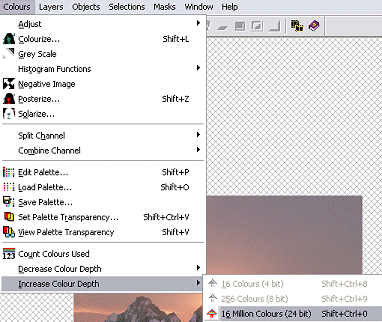
First
we need to make sure we've got all the
colours available to us, so go to the
Colours menu, down to Increase Colour
Depth and across to 16 Million Colours

Now
that we've got all our colours to play
with, we can get on with adding our
mask to our picture! :o)
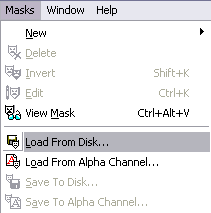
We
need to tell PSP that we want to use a
mask on our picture and we need to
tell it where to look for the mask, so
go to the Masks menu, then down to
Load From Disk - this tells PSP that
the picture is saved on our machine

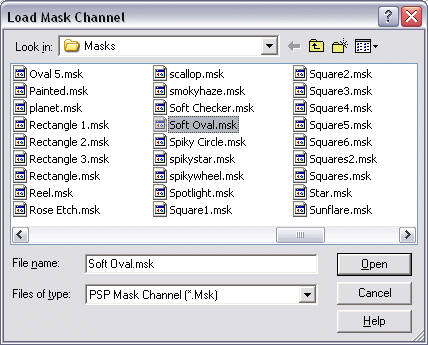
You'll
now have a dialogue box on your screen
- this is PSP asking you where your
mask is stored on your computer.
Using the drop-down list at the top,
navigate to your Masks directory
within PSP - you'll get a list of all
the masks on your computer. In
this list, you need to find the one
called "Soft Oval" - this is
the mask that you extracted from the
zip file at the start of the
tutorial. Single click on the
name to highlight it and then hit Open

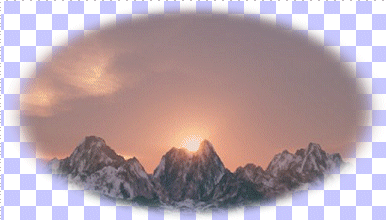
Et
Voila! Your mask has now been
applied to your picture!

Now
you can just take a copy of this and
paste it onto wherever you want to use
it! Try out some of the other
masks that you have on your computer
and see what they look like - some of
them have really interesting
effects! :o)

